#The First Berserker: Khazan – All bosses so as – Destructoid

Table of Contents
The First Berserker: Khazan stays fairly true to the usual Soulslike method, prioritizing exhilarating boss fights over all the pieces else. Listed below are all of The First Berserker: Khazan bosses within the order that you’ll encounter them.
All Important Mission Bosses in The First Berserker: Khazan
In whole, there are 16 Important Mission Bosses in The First Berserker: Khazan, a few of which have a number of phases which can be every their very own separate struggle. We’ve compiled an inventory of the entire Important Mission Bosses in The First Berserker: Khazan within the order by which you’ll encounter them, in addition to transient methods for every boss:
Mission 1 Boss – Yetuga
Yetuga, the Mission 1 Boss of The First Berserker: Khazan is likely one of the most aggressive creatures within the snowy mountains, and is very territorial. Yetuga exhibits unconditional hostility in direction of something that strikes, so be ready for quick engagement! As Yetuga is a frost-based encounter, you’ll need to carry some helpful gadgets that counter frost-based standing results.
Key Boss Technique Ideas for Yetuga
- Deal with first destroying Yetuga’s Ice Spikes as it should take away his capability to make use of Ice Spike Assaults, making the struggle a lot simpler.
- Make sure you keep away from Yetuga’s seize assaults by dodging them, as they’ll rapidly lead to your demise.
- Attempt to stick close to Yetuga’s rear as a lot of his assaults are frontal, making it simpler to keep away from taking injury whereas upkeeping sustained injury your self.
- When doable, bait Yetuga into slamming into partitions when he does his cost assaults, as it should lead to a long-duration Stagger the place you may get loads of simple assaults on him.
Mission 2 Boss – Blade Phantom
The Blade Phantom is a specter that has been summoned to the mortal realm below Charon’s command with the duty of restoring order within the Netherworld. It’s made up of numerous spirits which make the Blade Phantom develop stronger when it absorbs the souls of highly effective warriors. You may time a Excellent Guard towards the Blade Phantom for an enormous alternative to counterattack.
Key Boss Technique Ideas for Blade Phantom
- Attempt to time a Excellent guard when the Blade Phantom does its closing strike with the Netherworld Spear or Twin Swords assault and observe up with a flurry of counterattacks.
- Play defensively till the Blade Phantom drains its Stamina by attacking, after which assault the boss aggressively.
Mission 3 Boss – Viper (Section 1)
Viper is a high-ranking dragonkin created by Hismar and serves because the final chief of the defeated dragons. He possesses a fraction of Hismar’s energy and wields it for higher power when crucial. The Viper boss additionally has a Excellent Guard alternative in Section 1.
Key Boss Technique Ideas for Viper (Section 1)
- You may break the Viper’s horns to reveal a weak level that takes elevated injury.
- Watch out of the Viper’s spear-throwing assault which offers large injury.
- A efficiently timed Excellent Guard throughout its five-attack Speedy Strike can ship it right into a Staggered state the place you may counterattack with ease.
Mission 3 Boss – Viper (Section 2)
In Section 2, the Viper is corrupted by the ability of the Berserk Dragon, growing his general power and altering his mechanics all through the struggle.
Key Boss Technique Ideas for Viper (Section 2)
- You may nonetheless break the Viper’s horn to reveal a weak level that takes elevated injury.
- Any assaults coming from Viper’s right-hand may be countered or blocked by way of Excellent Guard, although his left-hand assaults have to be dodged.
- When the Viper begins the Darkness Section, you may time an ambush with the Lightning Strike to enhance your likelihood of survival.
Mission 4 Boss – Volbaino
The once-honored guardian of the village of Phraugh, Volbaino was taken by the dragonkin once they invaded his village. He was used for compelled labor however succumbed to an infinite cycle of violence and torture. Volbaino wields a chisel and hammer in an try and obliterate all the pieces in his path. You’ll need to carry gadgets that counter the burn standing results for this encounter.
Key Boss Technique Ideas for Volbaino
- Volbaino is briefly weak when pulling out his Chisel.
- Look out for flames throughout the sector, and climb to the second ground by way of the close by ladders when the sector turns into engulfed in flames.
- You may execute a Excellent Guard to extinguish the flames when Volbaino’s Chisel is on fireplace. You may also assault it when it’s embedded into the bottom to place out the hearth.
Mission 5 Boss – Aratra
The large man-eating spider Aratra hunts its prey with its devastating fangs and armored entrance legs. Aratra has lethal mobility capable of launch ambush assaults from its numerous spider dens. Destroying these spider dens alongside the pathway of this encounter will restrict Aratra’s capability to ambush you.
Key Boss Technique Ideas for Aratra
- Destroy each of Aratra’s entrance legs to disable its claw assaults, making the encounter simpler.
- You may also break Aratra’s bulbous inexperienced stomach space to disable its poison-based assaults.
- When Aratra climbs the partitions you may throw a spear at its stomach to knock it down.
Mission 6 Boss – Rangkus
Rangkus is the second-in-command of the Knivesveil, and is of course gifted at crafting weapons. As such he wields a flexible weapon that may bludgeon, be used as a crossbow, and in addition as a flamethrower. You’ll need to carry fire-purifying gadgets to fight the burn standing results for this encounter.
Key Boss Technique Ideas for Rangkus
- You may Excellent Guard the ultimate hit of Rangkus’ bludgeon combo for a serious fight benefit.
- Dodging multi-shot assaults from Rangkus will deplete his Stamina leaving him uncovered for counterattacks.
- Rangkus may be extra successfully fought at close-range versus mid or lengthy vary.
Mission 7 Boss – Maluca
The chief of Knivesveil, Maluca is a grasp swordsman who wields twin greatswords and curved swords. Maluca has been reworked right into a Corrupted One by Ozma which provides chaotic energy to his assaults. As such, you’ll need to carry chaos-purifying gadgets for this encounter.
Key Boss Technique Ideas for Maluca
- It’s finest to dodge Maluca’s twin greatsword assaults whilst you can block or Excellent Guard his curved sword assaults.
- A Excellent Guard towards his quick-draw assaults provides you a robust counterattack alternative.
- You may bait Maluca into prolonged assault chains to empty his Stamina and expose him.
- When Malulace transforms right into a Corrupted One you may dodge his first curved sword ability assault.
Mission 8 Boss – Elamein
The shield-wielding warrior, Elamein, is ready to take up blows and redirect them as counterattacks. She has misplaced her sanity from a corruption sigil in El Ravaca and is now a Corrupted One. You need to carry Lightning purification gadgets for this encounter.
Key Boss Technique Ideas for Elamein
- Don’t enter an Exhausted State all through this encounter or Elamein will observe up with a lethal Brutal Assault.
- The extra you let her protect take up, the stronger her counterattacks will probably be.
- It’s finest to assault Elamein from behind the place she can’t block along with her protect.
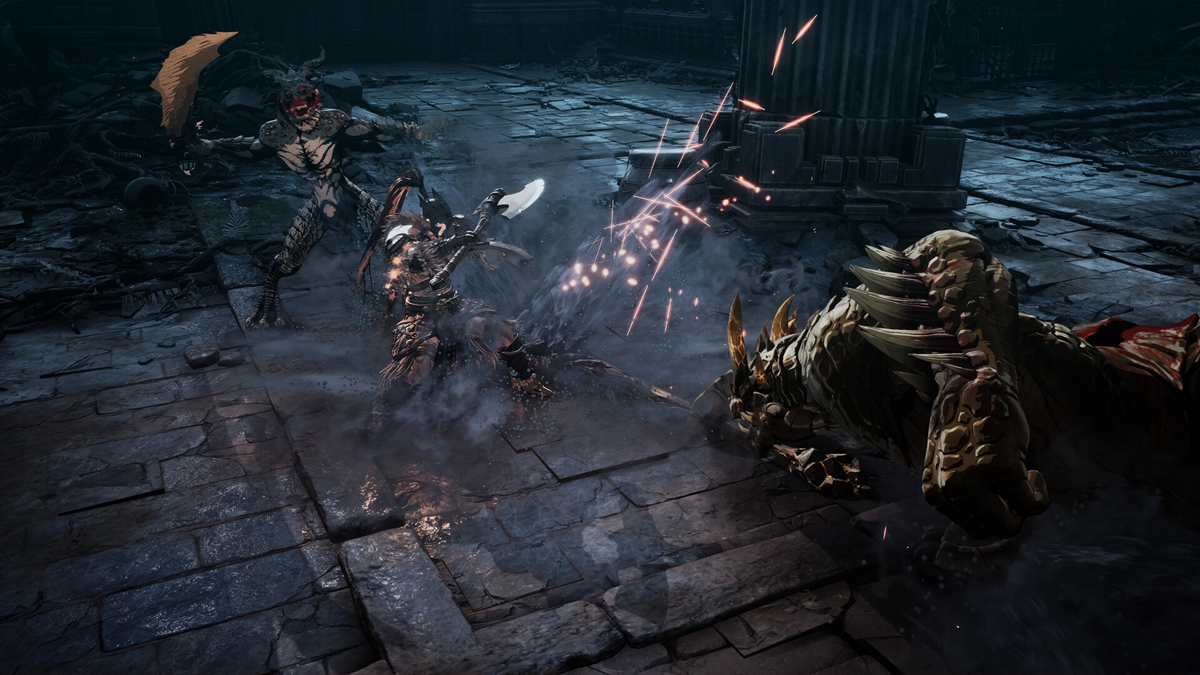
Mission 9 Boss – Shactuka
Shactuka is a ferocious beast captured by the Imperial Troopers. The beast’s razor-sharp claws and monstrous fangs make it a lethal predator. You’ll need to carry Plague purification gadgets for this encounter.
Key Boss Technique Ideas for Shactuka
- You need to goal Shactuka’s head as it’s its weak level.
- It’s necessary to alternate between dodging and guarding throughout this encounter, particularly following Shactuka’s high-jump assault.
- It’s higher to dodge Plague-inflicting assaults reasonably than block and even Excellent Guard them to stop the plague standing impact.
Mission 10 Boss – Trokka
Trokka is a religious follower of Ozma who wields energy granted to her to flood Aldevir. As such, the mage is a water magic caster and makes use of a novel staff-umbrella hybrid weapon. It would be best to carry Water purification gadgets for this encounter.
Key Boss Technique Ideas for Trokka
- Shut-range positioning is more practical than long-range for this encounter.
- Interrupt Trokka’s magic casting with preemptive assaults. You may also counterattack when she prices her Umbrella Burst Assault.
- The Purple Jellyfish inflicts poison once you contact it, whereas the Blue Jellyfish restores Stamina.
Mission 11 Boss – Bellerian
This Darkish Elf mage from the Kingdom of Fennes focuses on Necromancy and Spirit Conjuration. With all of Bellerian’s elemental assaults, you’ll need Fireplace, Earth, and Lightning purification gadgets for this encounter.
Key Boss Technique Ideas for Bellerian
- You may interrupt Bellerian’s spellcasting with preemptive assaults.
- Bellerian will devour Skulls to summon highly effective undead minions.
- You may assault to disrupt the Cranium power buildup, stopping the minion summoning.
Mission 12 Boss – Skalpel
Skalpel was as soon as Khazan’s comrade, who even tried to clear Khazan’s identify of treason, however he was captured and become a Corrupted one. Now consumed by chaotic energy, his sanity is misplaced and he’s a bloodthirsty berserker. It would be best to carry Plague purification gadgets for this encounter.
Key Boss Technique Ideas for Skalpel
- You need to stop Skalpel from build up his Berserk state.
- Keep away from getting hit by his blade to reduce this buildup.
- You may interrupt his Ritual by attacking the coffin earlier than he infuses it with blood.
- Make the most of Excellent Guard towards his long-reaching Greatsword assaults, however dodge his high-impact coffin assaults.
Mission 13 Boss – Princess Ilyna
The princess of the Empire who beloved music tried to cease the Empire’s demise and Ozma’s schemes however failed. She was found, captured, and become a Corrupted One. It would be best to carry Chaos purification gadgets for this encounter.
Key Boss Technique Ideas for Princess Ilyna
- You may evade her Rapier assaults by dodging to the facet or diagonally, and following up with a counterattack.
- You may also keep away from her musical assaults by dodging them on the proper second.
- Attempt to establish the Choir’s place to know which option to successfully dodge the sound wave assaults.
Mission 14 Boss – Hismar
The Berserk Dragon Hismar as soon as threatened the Pell Los Empire, however his fallen physique was revived by Ozma’s chaotic energy. You’ll need to carry Chaos purification gadgets for this encounter.
Key Boss Technique Ideas for Hismar
- You may destroy Hismar’s horn to stop his lethal horn-related assaults, which it’s best to do ASAP.
- Hismar’s brow turns into a weak level so make sure that to focus it.
- When Hismar is flying in a weakened state you may hit him with a spear to pressure him to crash.
- As Hismar’s physique glows purple, it should unleash Chaos-based assaults, which it’s best to dodge reasonably than block.
Mission 15 Boss – Reese (Section 1)
Authentic Ozma’s lover, a priestess of the church of Pell Los, Reese’s as soon as divine energy has been corrupted by chaos. This has resulted in a fusion of sunshine and chaos magic. You’ll need to carry Chaos purification gadgets for this encounter.
Key Boss Technique Ideas for Reese (Section 1)
- You may Excellent Guard Reese’s Wing Cost to pressure her to crash and enter a Staggered state.
- Use the summoned Partitions strategically to dam her spear-throwing assaults.
- When Chaos Amplication builds up her magic turns into stronger and he or she turns into immune to wreck. You could maintain fixed assaults to interrupt this Chaos Amplification.
Mission 15 Boss – Reese (Section 2)
In Section 2, Reese is totally consumed by Chaos, shedding all her Holy Energy. Her chaos-infused Twin Scythes are very lethal. You’ll need to carry Chaos purification gadgets for this encounter.
Key Boss Technique Ideas for Reese (Section 2)
- You may nonetheless Excellent Guard towards her Wing Cost assault to pressure her to crash and turn into Staggered.
- As soon as once more use the summoned partitions to dam her spear-throwing assaults.
- Excellent Guard or dodge her lethal Twin Scythe assaults as they’re extremely lethal on this part.
Mission 16 Boss – Ozma (Section 1)
The hero who defeated Hismar the Berserk Dragon, and finest good friend to Khazan, Ozma has now been corrupted by pure chaos. You want Chaos, Fireplace, and Water purification gadgets for this encounter.
Key Boss Technique Ideas for Ozma (Section 1)
- Shut-range fight is finest on this part as Ozma assaults extra the additional away you’re.
- Destroy Chaos Spears as they’ll accumulate and set off highly effective assaults if embedded within the floor for too lengthy.
- Use Excellent Guard or Parry to neutralize incoming Chaos Spears.
Mission 16 Boss – Ozma (Section 2)
In Section 2, Ozma has ascended to full Godhood pushed by his hatred for Empire and Humanity. He has totally embraced the Chaos and solid apart all Human emotion. You want Chaos purification gadgets for this encounter.
Key Boss Technique Ideas for Ozma (Section 2)
- You need to dodge any Chaos-infused assaults to stop chaos buildup reasonably than block them.
- Use a Excellent Guard for non-chaos bodily assaults.
- Ozma unleashes a lethal Chaos capability when all 8-winged eyes open. Highly effective Chaos magic closes the eyes briefly which is a gap for counterattacks.
- Stop the eyes from reopening to keep up management of the struggle whereas Ozma recharges his Chaos assaults.
Mission 16 Boss – Ozma (Section 3)
The ultimate part of the Ozma struggle contains a totally corrupted Chaos Ozma, and you should defeat it to unlock the True Ending. We’ve but to set off this part, so we are going to replace right here as soon as we’ve got!


