#The Remaining Form – Destructoid

Table of Contents
The Remaining Form – Destructoid
Liminality is the Strike added to Future 2 with The Remaining Form enlargement, and it’s an actual banger. It’s obtained every part that makes the enlargement’s marketing campaign a lot enjoyable to play by and types a key a part of it in the direction of the tip, however it’s pretty complicated the primary time round.
You’ll first play by Liminality as a story story mission when experiencing The Remaining Form‘s marketing campaign. It’s positively not the meatiest mission within the story, however it has a number of mechanics that can drive you to assume in your ft and a few extraordinarily pressured encounters you gained’t have seen earlier than. I imagine that is one of the best strike we’ve ever had within the sport, however it actually takes some getting used to it if you’re initially exploring it.
The right way to full Liminality in Future 2: The Remaining Form
Beneath, I’ve outlined precisely the way to full Liminality in Future 2: The Remaining Form. Every step roughly covers a single encounter, so in the event you’re caught on a selected half, take a look for it under and uncover what you’ll want to do.
Step 1: Drain the Purulence
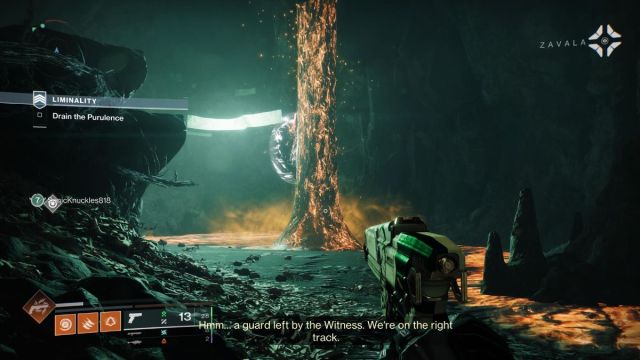
Should you’re like me, you’ll comply with the opposite two Guardians you matchmake with by this Strike, killing enemies, cleansing cave openings with vines in them, and leaping throughout platforms till you enter a cave stuffed with Purulence. This blocker The Witness put in place to cease you from progressing, and also you’ve obtained to take away it.
Nonetheless, that is additionally a little bit of a story step to assist clarify a mechanic you want later. Take heed to what the Vanguard says over the radio, gather the vitality from enemies, and apply it to the Ahamkara Cranium to kill the Wizard and drain the Purulence.
The following part is simply traversal and pushing ahead, so comply with the trail down by the place the Purulence was. It’s tremendous creepy and filled with palms and faces, similar to the remainder of The Pale Coronary heart, and actually is value pausing to understand right here and there.
Step 2: Break Lucent Seals

The following encounter requires you to interrupt three Lucent Seals. This isn’t sophisticated in any respect. Kill enemies in right here till a Seal-Keeper spawns, then kill that to interrupt a Lucent Seal. Do that 3 times, and also you’ll be out of there, however watch out as a result of the realm will get filled with enemies so quick throughout this encounter.
Transfer ahead and admire that Witness structure once more. Pay attention to the scary palms and really feel that sense of unease as a result of the subsequent encounter will push you past your limits.
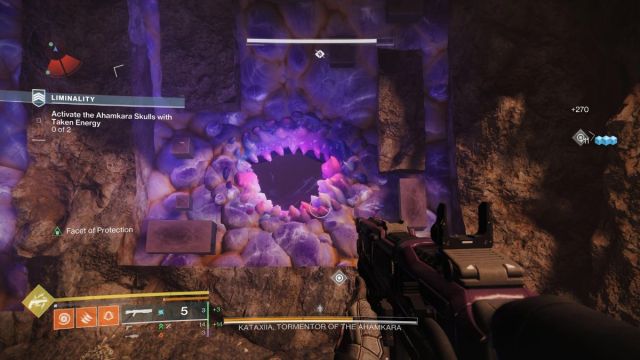
Step 3: Activate the Ahamkara Skulls with Taken Vitality

As you enter the room, you’ll see an enormous Tormentor that’s going to spawn in enemies to essentially make this tiny room really feel a lot smaller and extra deadly. Your job is to seek out some Taken Vitality after which use it to activate the Ahamkara Skulls within the room.
To do that, kill a number of enemies and anticipate orange portals to spawn on both aspect of the room. You possibly can soar by these to enter a brand new space the place you’ll see a ball of Taken Vitality. The room on the left is an extended hall that you simply’ll have to dash out of as Purulence fills it if you attempt to escape. Run as quick as you may to get out. Should you die, you’ll want to aim this one once more.
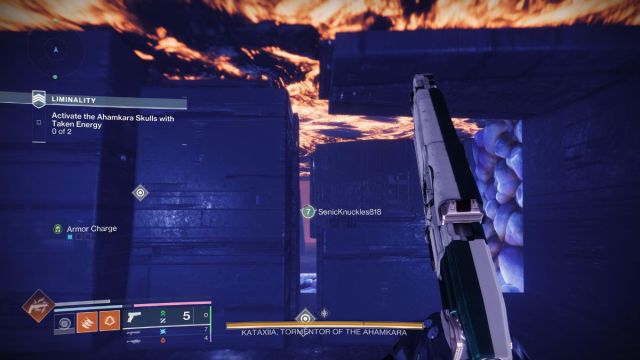
The room on the fitting fills with Purulence from the bottom up when you decide up the Taken Vitality. You’ll want to soar on the platforms that seem as you climb to flee with the Taken Vitality. Whichever portal and room you efficiently extract Taken Vitality from, be sure to head on to an Ahamkara Cranium to activate it earlier than you’re killed.
After I did this, our fireteam appeared to make use of the identical portal and room for Taken Vitality twice. Nonetheless, it’s positively simpler to have two of you peel off into your portals and velocity up the method. The following encounter is method much less irritating however much more harrowing.
Step 4: Examine the veiled statue and survive
Following a bit extra exploration, you’ll enter an enormous metropolis that your Ghost says we’ve by no means seen something like earlier than. I urge to vary as a result of it seems to be quite a bit just like the areas you go to in Season of the Deep. Regardless, right here, your job is to analyze the veiled statue.
If you work together with it, town goes to go on the alert, and enemies will pour in. You’ve obtained to outlive and work together with the statue between waves to get the complete story from it. It’s a simple encounter in the event you stand on the upper floor near the statue and don’t transfer off. The realm will shortly get tighter, however you need to be fantastic so long as you utilize a strong weapon like The Name.
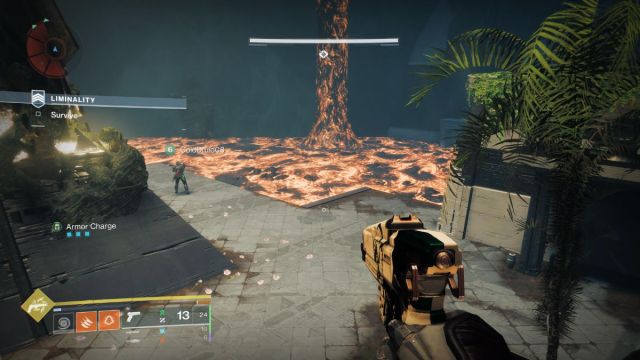
Step 5: Defeat the Tormentor
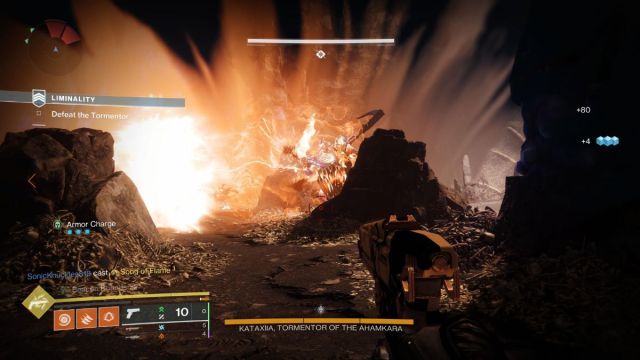
Your subsequent job is to defeat a Tormentor within the nastiest room I’ve ever seen in Future 2. The Witness positively didn’t assume it could have company right here as a result of there are Ahamkara guts in every single place, and also you’ve obtained to get proper as much as them on this battle.
The Tormentor has three sections of well being. After the primary one is gone, it’ll get a protect up, and you’ll want to activate the Ahamkara Skulls within the area utilizing Taken Vitality. You could hop into the gaping, purple intestinal holes to get that Taken Vitality. There’s one on both sides of the room, each resulting in totally different rooms.
Every room you teleport to is a fast sprint with Taken Vitality to get again to the world with the Tormentor. When you’re again, activate the Ahamkara Skulls and begin killing the tormentor once more. The final well being chunk requires another little bit of Taken Vitality you decide up from a particular Subjugator that spawns in that’s used on one other Ahamkara Cranium in the back of the room. Following that super effort, you may lastly finish this Tormentor.
That’s the tip of the Strike. You’ll decide up your loot after the Tormentor is down and might really feel protected as soon as extra. Take heed to what the Vanguard is saying once more as a result of there are some huge, necessary items of the story that can inform what you do subsequent in there.


