#The Remaining Form – Destructoid

Table of Contents
The Remaining Form – Destructoid
Requiem is the fourth marketing campaign mission in Future 2: The Remaining Form and sees you head out into The Pale Coronary heart looking for Zavala. He’s the final member of the Vanguard that you must pull into your group, however he’s additionally the one preventing essentially the most demons with The Witness.
This mission isn’t an excessive amount of of a problem for essentially the most half. Nonetheless, its second half is certainly extra difficult than its first. Be sure to filter not less than an hour for this one since you’ll nearly actually get caught whereas studying the mechanics and determining what it’s you must do.
Learn how to full Requiem in Future 2: The Remaining Form
Under, I’ve defined the way you full Requiem in Future 2: The Remaining Form with a step-by-step information via each part of it. If you happen to get caught, learn via what you’re meant to do and are available at it from a special approach.
Step 1: Study the Glyphtouched puzzle
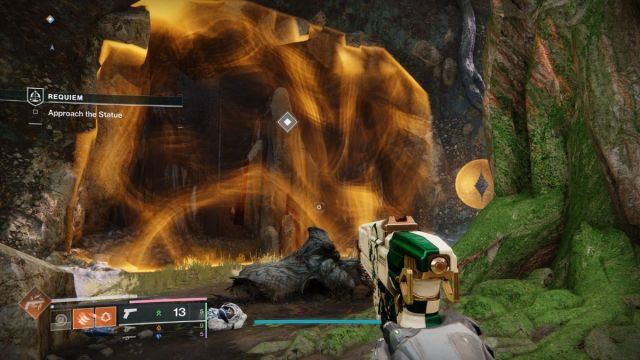
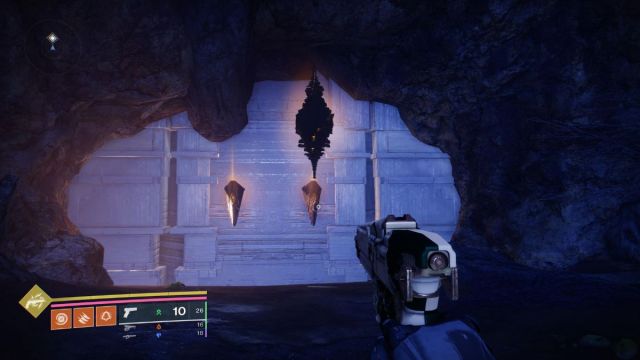
As you launch the mission, you’ll be directed to Zavala’s final recognized location. After killing the enemies there, you’ll discover a statue behind a darkness barrier. The small key for the barrier will drop its defend, and you could shoot it. This may spawn an enemy and provide the Glyphtouched standing. It’s a brand new kind of puzzle that you simply’re going to want to grasp.
Head over to the group of enemies that’s spawned and kill them till a giant one pops up. Whenever you kill that, it ought to drop a glyph. This adjustments each time you play the mission, so keep in mind the picture that you simply’re proven as a result of it’s essential.
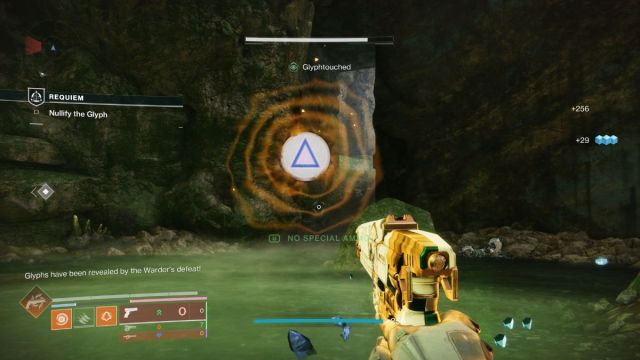
Whereas holding that picture in your thoughts, return to the darkness barrier. It’s best to now see 4 glyphs in entrance of it. Stroll into the glyph that matches the one the massive enemy you simply killed dropped. This could kill the defend for the statue, permitting you to work together with it.
Step 2: Full one other glyph puzzle and observe Zavala
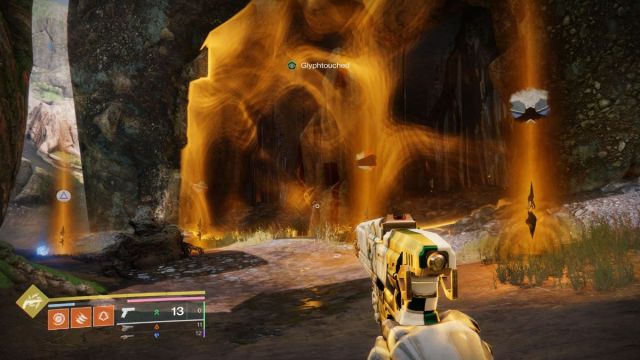
Examine the statue after which transfer into the subsequent space. That is the place you’ll want to finish one other glyph puzzle. It’s precisely the identical as earlier than. Destroy the small lock to change into Glyphtouched, kill enemies till a big one spawns, kill that and keep in mind the glyph it drops, then stroll into the identical glyph again on the barrier.
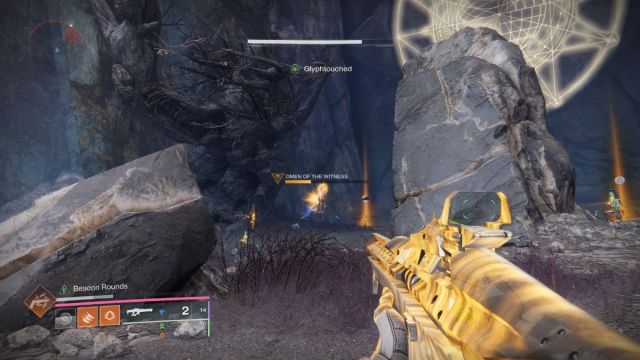
The one slight distinction is that an Omen of The Witness will now spawn and attempt to kill you when you full the puzzle. This enemy isn’t too troublesome to take down, but it surely’s simpler in case you have your Tremendous useful. Stroll via the barrier, and also you’ll enter a cave, the place the true enjoyable begins.
Step 3: Sort out a double glyph puzzle
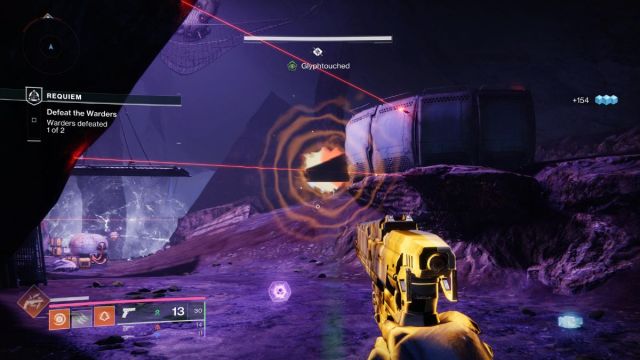
The cave holds a double glyph puzzle. It’s just about what it seems like. There are two locks on the door, so that you’ve obtained to search out two glyphs by killing massive enemies after which activate each of them. Shoot the lock to achieve the Glyphtouched standing after which head off to the primary group of enemies.
This group is simple to kill. Take your time so that you don’t lose an excessive amount of well being when the massive boss dies. After you kill it, extra enemies and traps will spawn in to dam your path to the opposite facet of the cave. That’s dangerous as a result of that’s the place the second boss is, and the second glyph you want.
Actually decelerate for this encounter. Enemies will rush you, so you possibly can maintain again and kill them whereas they line as much as take your pictures. Maintain a watch out for Tracer Shanks as you progress ahead as a result of they ended me right here quite a lot of instances. Observe that when you kill these enemies, they’re useless, so you possibly can clear a path very simply.
Repeat this course of and kill the second group of enemies. I like to recommend clearing out as many small ones as you possibly can first so that you’re left with nearly none to battle as soon as the miniboss is down. Whenever you do kill the larger enemy and it drops is glyph, memorize it and be prepared for a combat.
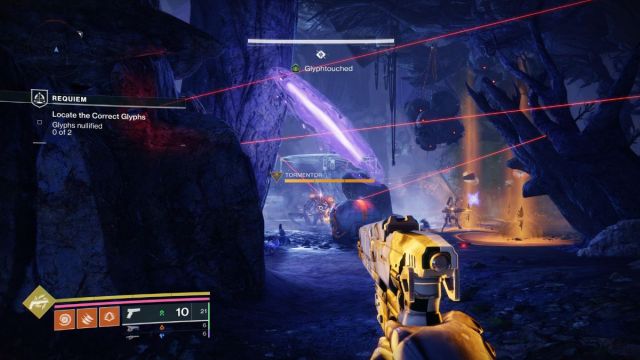
You now must get again to the door with two locks and activate the 2 glyphs you’ve seen by stepping on them. Do what you probably did earlier than and go slowly, killing the enemies that come to you. As you strategy the door, Dread enemies will spawn. Maintain these guys at bay as a result of a Tormentor will spawn and rush you.
This man isn’t enjoying round. The easiest way to kill it’s to again as much as the realm the place you killed the second glyph boss and run round there to combat the Tormentor with out too many traps. I used my Tremendous to complete it off, however your strongest weapon ought to do the trick.
Whenever you observe the trail, you’ll see and find out about what The Witness has been providing to Zavala. It’s not fairly. The Witness promised to carry his useless household again, and Zavala instructed it no, though it’s all he needs within the universe.
Step 4: Defend Zavala’s home
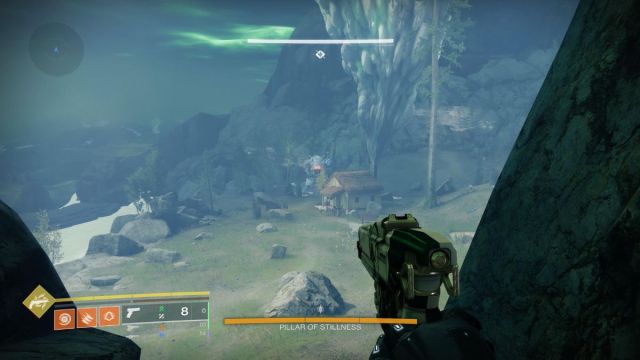
The ultimate a part of Requiem sees you find Zavala by his home, which has been utterly overrun by The Witness. When you communicate to him, a boss known as Pillar of Stillness will spawn, and also you’ll must combat via just a few phases to beat it.
First, whittle down this enemy’s preliminary third of well being. This may trigger it to tug up a defend and spawn in additional enemies so that you can kill. When you’ve killed that wave, repeat the method till you’ve killed it. The ultimate section is the worst as a result of it has a Harbinger enemy to take care of.
The one solution to beat this boss is to watch out. After the second section, wait out the enemies and kill them as they strategy you. Then, within the third section, kill the boss as shortly as doable earlier than shifting on to the smaller enemies to take care of them.
The tip of this mission sees Zavala meet up with everybody you’ve rescued to this point in The Pale Coronary heart. That is the group you’ll be tackling The Witness with because the marketing campaign progresses.


