#The best way to obtain and add screenshots on Nintendo Change 2 – Destructoid

Table of Contents
What good is a giant W in gaming if you happen to can’t share it on-line and boast about it to pals and enemies alike?
Fortunately, the Nintendo Change 2, like its predecessor, has a button for screenshotting something that occurs in your video games. However to share the screenshots, you should take some steps to get them onto a wise machine so as to then put up them on-line.
Right here’s every part you should find out about the right way to take screenshots on the Nintendo Change 2, add them, and obtain them on to your units so you’ll be able to share them with pals.
The best way to obtain and add screenshots on Nintendo Change 2
To view and obtain your Nintendo Change 2 screenshots, you want the Nintendo Change cellular app for Android or iOS. Screenshots you’re taking in your Change 2 should be uploaded to the app so you’ll be able to then obtain them from the app onto your sensible telephone and use them how you want.
To search out the app, search “Nintendo Change” on the Google Play Retailer or Apple App Retailer, obtain it onto your sensible machine, and log in with the identical Nintendo On-line account that you simply’re utilizing in your Change 2.

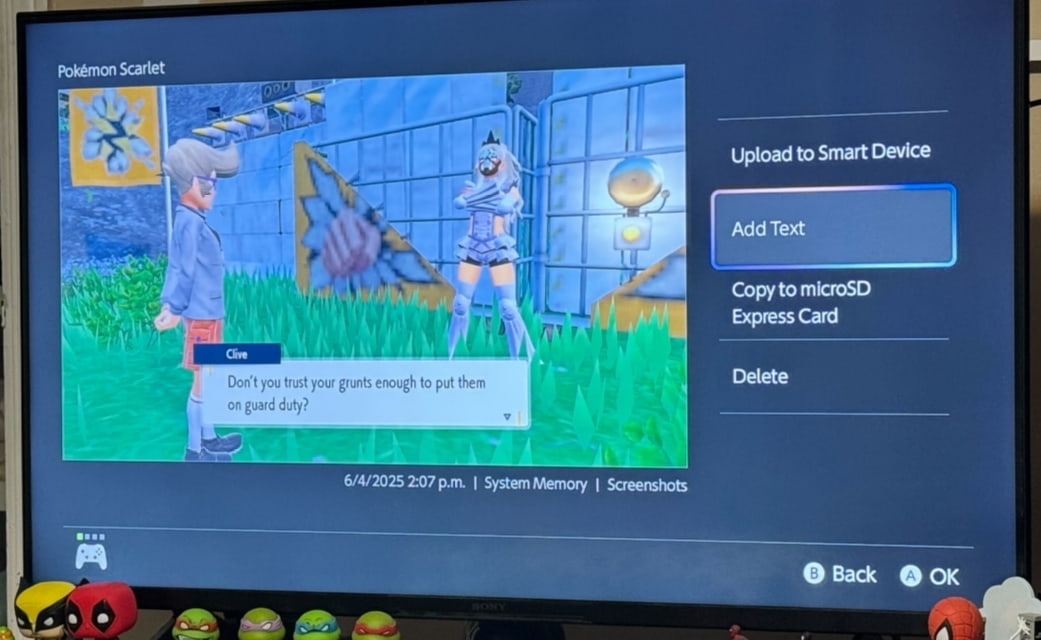
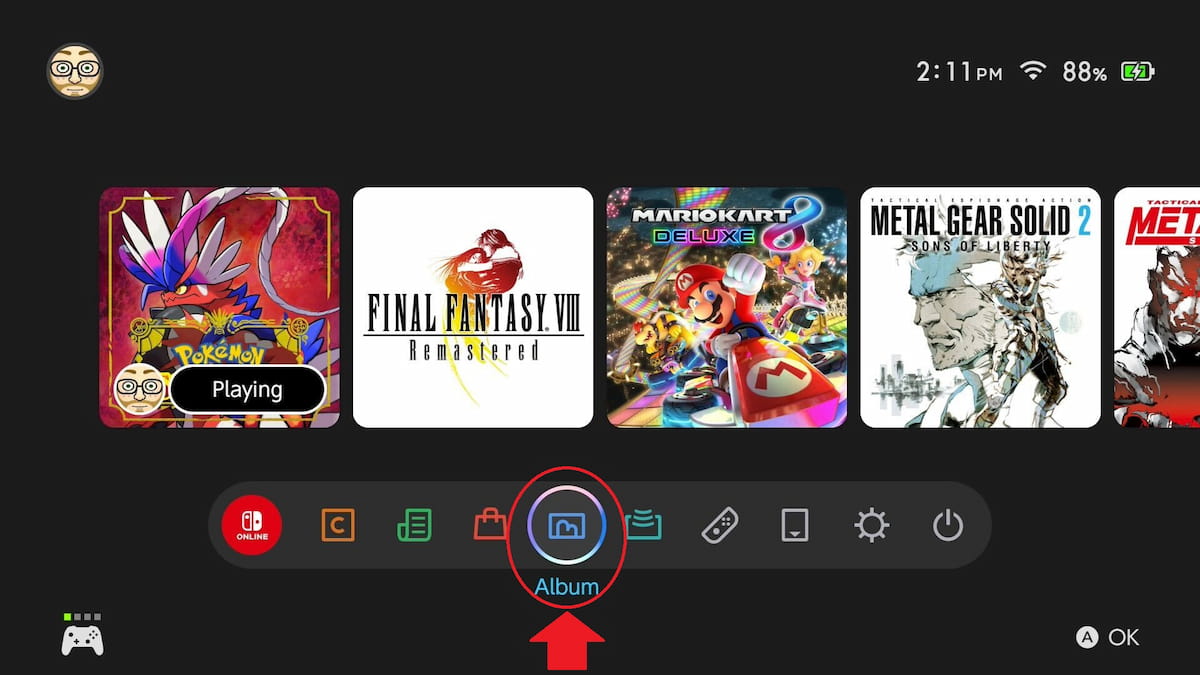
To take a screenshot on Change 2, use the screenshot button (the sq. button with a circle inside on the left JoyCon or left aspect of the Professional Controller). To add it, entry the Album button from the Residence menu, or press the Residence button shortly after screenshotting.
Out of your Album, choose the screenshot you need and press A to open up its Menu. Then, choose Add to Good System to search out it in your Nintendo Change app in your telephone.
Within the cellular app, choose the underside proper Album icon (it’s the identical as it’s on the Change 2) to see your whole uploaded screenshots. You may choose every screenshot individually to obtain them onto your machine, or press Share to open up your machine’s sharing choices.


